Wednesday, April 7, 2010

Sant' Ambroeus Milan


Last week I spent three days with my mom in Milan. I hadn't been to Milan since I was really young and we were visiting some family friends. In anticipation of the trip I read up on some restaurants in Milan, but most of them were quite expensive. We finally decided on Trattoria Milanese the first night. It was listed in our guidebook and wasn't far from our hotel. We didn't have a reservation and were seated at a table with an older couple. The food turned out to be good, but we still found the restaurant overpriced. I took one picture of our artichoke appetizer and after overhearing the Italian woman at our table make fun of me for taking a picture of artichokes (she probably thought I'd never seen them before) I stopped taking pictures. End of story. Next time I will ask our Milanese friends for restaurant tips.

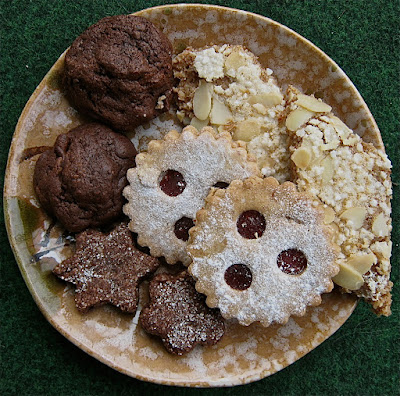
I do, however, have a recommendation for the best cappuccino EVER, well so far. I still have many to try. We had great cappuccino twice at Sant' Ambroeus. We didn't bother sitting down and took our cappuccino standing up Italian-style. The cappuccino was perfect! So perfect that we went back two days later. But this time we also got some pastries to go with the coffee. It wasn't easy choosing them since there were so many and there weren't any labels in front of them saying what each one was. I could tell the patience of the lady behind the counter was limited so we ended up pointing to four good looking pastries in the hope that we got something tasty. Turns out we ended up with (from left to right) tiramisu, vanilla cream puff, wood strawberry and cream and a chocolate pastry with some type of red berry filling. Each one was delicious!

Sunday, February 28, 2010

Crème Caramel


I never thought I would actually get around to making crème caramel some day. I love crème caramel, but just the thought of having to bake it in a water bath made me go "nah, too much work". That's how lazy I am.
But yesterday I found myself in the situation of planning dinner for guests the same night and needing a dessert that wasn't cakey or chocolatey. Dinner was going to be roast chicken with vegetable and red wine risotto. Wanting something light, I searched through my cookbooks for something lemony, but couldn't find anything that sounded good. While searching I stumbled upon Carole Bloom's "Crème Caramel" in her book The Essential Baker and put myself up for the challenge.
The result was heavenly, divine, exquisite. Never underestimate the power of vanilla freshly scraped from the pod! And it turns out the whole water bath thing isn't too bad after all. Getting the caramel just right was worse.


Recipe
8 1/2 cup servings

1/2 c sugar
1/4 c water
2 tbsp. water
21/2 c milk
1 vanilla bean
3 eggs, at room temp
3 egg yolks, at room temp
1/2 c granulated sugar
1 quart (1 liter) boiling water

Center a rack in the oven and preheat to 350°F (177°C).

Caramel
Combine sugar and water in 1-quart saucepan over med-high heat. Bring mixture to boil and stir to dissolve sugar. Cook the mixture, without stirring, until it turns a rich golden brown, about 8 minutes.
Remove pan from heat and stir in the 2 tbsp. water. Be careful because water may bubble and foam up. Return pan to heat and stir with wooden spoon or heat-resistant spatula to dissolve any lumps.
Divide caramel evenly between oven-proof 1/2 c custard cups. Tilt and rotate so the caramel covers bottom of cups fully. Place cups in 3-quart baking dish or roasting pan.

Custard
Place milk in 2-quart saucepan. Split vanilla bean lengthwise and scrape seeds into milk. Add the pod to the milk. Warm the milk over med heat to the point when tiny bubbles become visible at the edges. Remove from heat and let the milk infuse.
Place the eggs and egg yolks in a bowl and whisk until frothy.
With the mixer on med speed, slowly sprinkle on sugar. In a steady stream, pour in warm milk and mix thoroughly.
Strain the custard into a measuring cup and remove the vanilla bean. Pour custard into the cups, dividing evenly.

Place the pan with the cups on the oven rack. Carefully pour boiling water into baking dish until it reaches halfway up the sides of the cups. Reduce oven temp to 325°F (163°C).
Bake for 40 min until a toothpick or cake tester inserted in the center comes out slightly moist and the center jiggles slightly when the pan is moved.
Remove the pan from the oven and transfer cups to a rack to cool completely.

To unmold the custards, run a thin-bladed knife around the edges of the custard cups. Place a serving plate over the top of the cup and invert custard onto plate.

Serve the custards immediately or refrigerate until ready to serve.

Tuesday, January 19, 2010

Pasta with Sweet Tomato Sauce and Baked Ricotta


Okay, I've got a new favorite pasta dish: Jamie Oliver's Pasta with Sweet Tomato Sauce and Baked Ricotta. YUM! The recipe is from his cookbook "Jamie's Dinners: The Essential Family Cookbook". It's a breeze to make and it tastes absolutely divine!


Serves 4

450 g ricotta
olive oil
salt and freshly ground black pepper
1 teasp. dried oregano
1/2 a dried chili, crumbled
1 onion, minced
2 cloves of garlic, minced

1 tablesp. butter
800 g whole canned tomatoes
3 tablesp. balsamic vinegar
1/2 teasp. sugar

500 g pappardelle

Fresh basil
Freshly grated parmesan

Preheat the oven to 200°C. Cover ricotta with olive oil, salt, pepper, oregano and chili. Bake in oven for about 20 min until it is golden brown and firm.
Cook onion and garlic in butter and olive oil for about 4 min. Add tomatoes and simmer for 15 min. Squash the tomatoes gently with a spoon, add the vinegar and sugar and stir until you get a nice tomato sauce.
Cook the noodles according to the package and keep some of the noddle water. Mix noodles with the tomato sauce and, if necessary, add noodle water to prevent the noodles from sticking. Add salt and pepper, basil and parmesan to taste. Divide between plates and crumble baked ricotta on top.

Friday, December 18, 2009

Christmas Cookies


For the first time in my life I made more than one or two different kinds of Christmas cookies. It may be the last time as I'm so sick of them already. Fortunately I didn't have to eat them all myself, but was able to pile them onto my coworkers. I may, however, have a lawsuit pending for causing weight gain in the workplace.

I went through several recipes before deciding on which ones to make. I finally settled for Zimtpitten and Brunsli (both Swiss recipes) as well as Triple Chocolate and Linzer Cookies. Zimtpitten are cookies made of ground almonds, lemon rind and lots of cinnamon. Brunsli are also made with ground almonds as well as cocoa, chocolate and Kirsch. Of the four, the Triple Chocolate and the Linzer Cookies were the best, but if you're a chocolate person like I am then the Triple Chocolate Cookies definitely win. They are like a combination of a chocolate cookie, a brownie and a truffle.

Both the Triple Chocolate and the Linzer Cookie recipes are from Field Guide to Cookies by Anita Chu. This little book has turned out to be a real charm. Every recipe I have made so far has turned out to be fabulous. I also really like the introduction to each cookie at the beginning of the recipe and the photos of each cookie found in the middle of the book. The recipes are also really easy to follow.

Triple Chocolate Cookies
1 3/4 c flour
1/4 c cocoa
1 3/4 tsp baking powder
1/4 tsp salt (I pretty much always leave salt out of sweet recipes)
12 oz ( 340 g) semisweet chocolate
1/2 c (110 g) softened unsalted butter
1 1/4 c dark brown sugar
1/4 c sugar
3 eggs
1 1/2 tsp vanilla extract
1 c (6 oz or 170 g) chocolate chips

1. Sift flour, cocoa, baking powder, and salt into a bowl and set aside.
2. Melt chocolate in a metal bowl and set over a pot of simmering water, stirring occasionally so it will melt evenly; remove from heat when smooth.
3. In a stand mixer (or in a bowl using a hand mixer, which is what I do), cream butter and sugars on medium speed for several minutes until light and fluffy. Add eggs and vanilla and mix until combined.
4. Pour in melted chocolate and beat until combined.
5. Add flour mixture and chocolate chips and mix on low until just incorporated.
6. Cover dough and refrigerate for about 15-20 minutes until it is firm enough to scoop. (My cookies didn't turn out flat like they were in the picture, but pretty much held the round form. I may have left the dough in the fridge too long. But the cookies tasted great, anyways.)
7. Preheat oven to 350°F (177°C). LIne several cookie sheets with parchment paper or silicone baking mats.
8. Roll dough into 1 1/2-inch balls and place on sheets about 2 inches apart.
9. Bake for 8-10 minutes--cookies will still appear soft but will firm up upon cooling. Cool cookie sheets on wire racks before removing cookies with a metal spatula.

Makes about 5 dozen cookies.

Store in airtight container for up to 2 weeks (or until all gone ;))


Wednesday, December 2, 2009

Wild Mushroom Pierogies


Sheesh, I've really been neglecting my blog lately. It doesn't help that Christmas is around the corner, meaning free time is crammed with buying gifts and making cookies! (Not that those are bad things, especially the cookie baking...)

About two weeks ago I made a Polish dish for the first time. I had bought mushrooms and was searching for mushroom recipes on epicurious using the iPhone application. Handy tool, by the way. After browsing various recipes I finally came across Wild Mushroom Pierogies. I had only tried pierogies once or twice before and felt it was time to eat a whole dish of them.

Since I made the dough for the pierogies from scratch, I spent a loooong time in the kitchen, which is not exactly fun after a long day at work and a good run afterwards. I was starving by the time the suckers were finished. So make sure you have enough time planned in for these. If you have a pasta machine, use it to get thin dough. I had trouble getting the dough thin enough by using a rolling pin.

Despite all the hard work involved, it was worth it. The pierogies were excellent.

Click here for the recipe.